Propagating Plants with Nuun Tubes
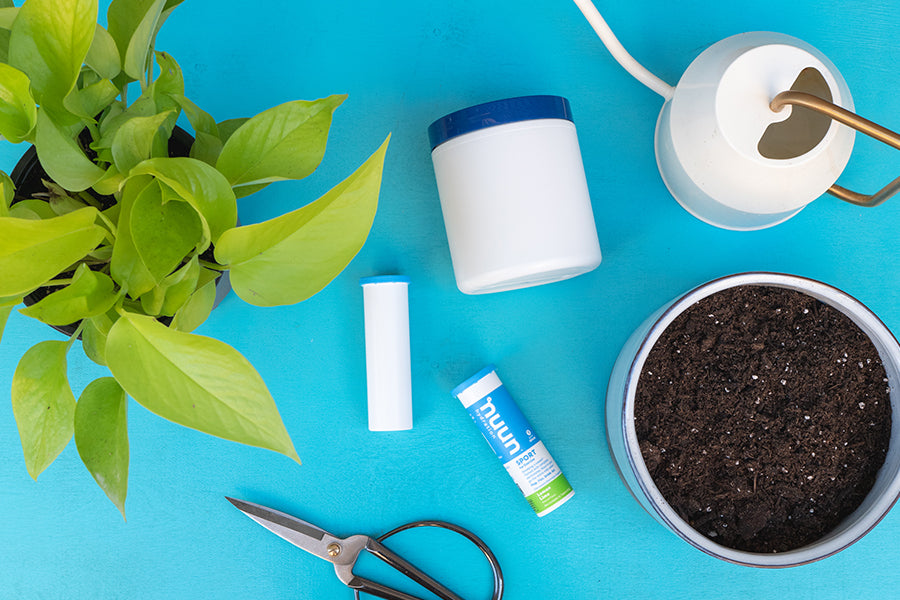
The three “R’s” of sustainability are Reduce, Reuse, and Recycle. Today we’re sharing one of our favorite new ways to reuse Nuun tubes—Plant propagation! For these instructions we’ll be talking specifically about a leafy vine called a Pothos Plant, but the general principles of plant propagation can be applied to a number of different varieties of houseplants or succulents.
Here’s what you need to get started:
-
Some empty Nuun tubes
-
A plant
-
Clean scissors or a sharp knife
-
Water
-
Potting soil
-
Final plant container (we used old Podium Series tubs!)
Step One: Trim!
Using clean scissors or a sharp knife, trim the vines of your Pothos plant to the desired length you want the plant to be. Plant propagation doesn’t require much, so at this stage focus on the existing houseplant and shape it to your desires. Once you’ve trimmed the plant, gather the trimmed vines, untangle the sections, and prepare for the next step.

Step Two: Shape Up!
Using your clean scissors or sharp knife, cut vines into individual propagation plants with one leaf per new plant. When trimming, leave a little bit of the main vine attached to the leaf stem to help balance the plant and because the section where the leaf stem meets the vine stem is where new roots will eventually form.

Step Three: Soak it!
Once you have your individual propagation plants shaped up, fill Nuun tubes with clean, fresh water. Place your plant trimmings into the Nuun tubes with the leaf part sticking up and out. Don’t overcrowd the plants or their roots might grow tangled together and make them harder to transfer to soil later. Place the tubes and plants in a warm, well-lit place and let time work its magic. Check on the progress of your cuttings and replace the water in the tubes every few days until the plants have at least an inch of new roots.

Step Four: Plant it!
Once your plants have roots it’s time to get them into the soil! Waiting too long can make it difficult for the plants to transition to from water to soil, so prioritize this process as soon as the roots are developed enough to do so. For our planter we used old Podium Series tubs with a hole poked in the bottom with scissors for drainage. You can use any container as long as it drains. Using your all-purpose potting soil fill the container halfway. Arrange the leaves with their roost resting on the soil around the outside rim of the planter, then fill in with more soil to cover the roots and stabilize the cuttings. Add water to the container until the soil is soaked and begins to drain. Place the pot in a sunny place and keep a close eye on watering until the trimmings are fully established and voila! You did it!


